Pages

Wednesday, April 8, 2020

DIY Scrub Cap

I've had a few people request the pattern I used to make my scrub caps, so I logged into my old, neglected (read too tired to photograph my food before eating and falling into bed) blog to provide a pictorial of the pattern I am using.

My four-year-old makes a much cuter picture 😉
There were two patterns I used online as the starting point for this pattern. A shout out to the following people for sharing their patterns:

https://www.slideshare.net/larissanichols9/scub-caps-how-to-diy-tu

( The second link is not responding. I'll edit and re-post when it's working.)

I found the first pattern was much too small for my head and the second one was much too large. The one I designed is somewhere in between the two. I made - and trashed - three caps before I got the right fit. I say this to warn you that everyone's head is a different size so you might have to juggle with the sizing based on your skull and how much hair to have to tuck inside the cap.

Browsing in a fabric store for cute or cool fabric prints is not an option for me today, since I nearly had my head chewed off at the grocery store yesterday because I didn't see a lady BEHIND ME with her shopping cart. Eyes in the back of my head is not my super power. End of rant. I found some
fabric scraps from past projects for my scrub caps and had no fabric left for this impromptu tutorial. Thanks, cute three-year-old for donating one of your old crib sheets.  Drool stains free of charge 😝. Only a few small tears were shed as she watched me rip up her sheet. This particular fabric was a little too thin so I made this cap with a double layer of fabric. I've included instructions for this as well. If you have a nice sturdy fabric, you can skip those steps. If you're using new fabric, please and wash and tumble dry your fabric before proceeding; otherwise, it will shrink the first time you wash your cap and then you'll be disappointed if it doesn't fit.

I printed off a grid so you can see the exact size. I used construction paper to make the templates. Card stock would work also. Or an empty cereal box.


 In case you can't decipher the scribbles on that first template, the size is 21" long and 6.5" high; the tie end is 2". Midway between the top and bottom of the curve you can put a little mark on your fabric if you like. I usually just eyeball it.

 Place the templates on the fabric that has been folded right sides together. Please note where the fold should be and make sure you have it right before you cut it! Use a fabric pencil or marker and trace each template onto the fabric and cut them out.


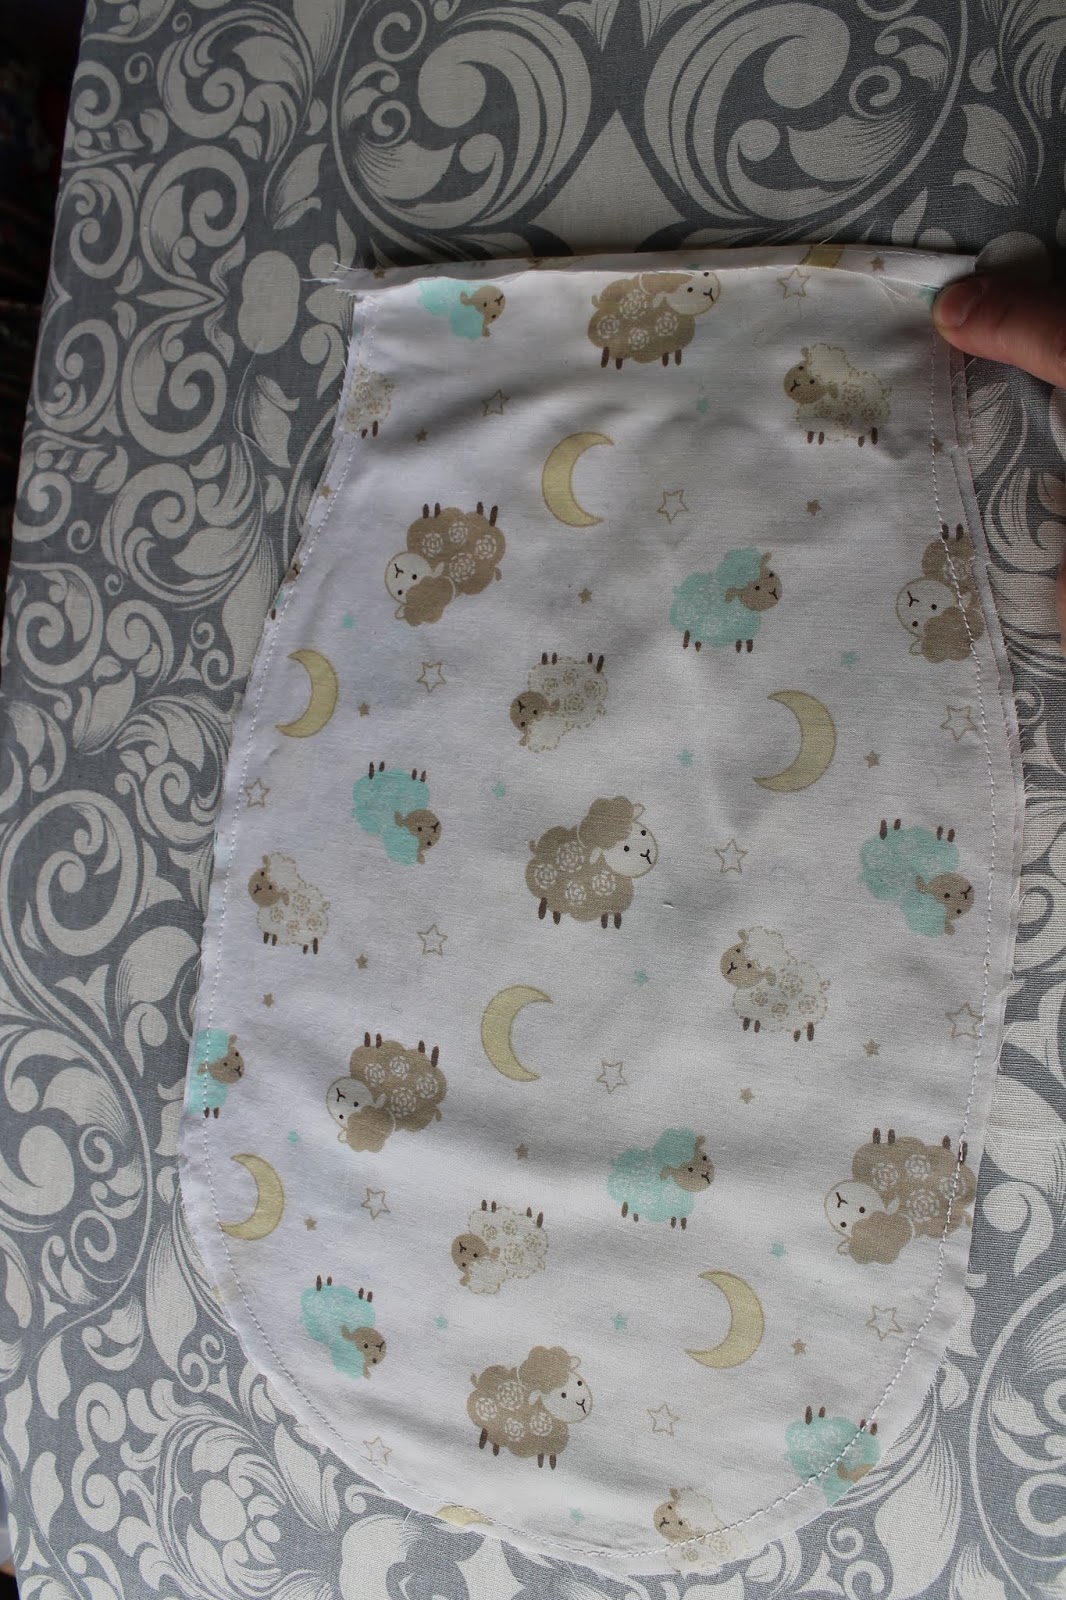
 This is what your fabric pieces will look like after they are cut:

If you are doubling your fabric to make a sturdier cap, cut out two identical copies of each template. Put the fabric pieces WRONG sides together and pin them.


Only do this if you are double layering your fabric; otherwise skip this step.

Baste the two pieces together with a straight stitch or basting stitch. Stitch close to the edge so you won't see these stitches in your final product.
Only do this step if you are double layering your fabric; otherwise skip this step.
 If you've doubled your fabric, you'll end up with two right sides. Choose a side to be the right side and wrong side. In my case, I chose the side with the least amount of drool stains 😬.


 On the larger piece of fabric where it curves downward, halfway between, press a seam allowance from there to the end. Do this on both ends.

 On the smaller piece of fabric, press a 1/4" seam and then another 1/2" seam. This is the casing for the elastic.
First fold


Second fold + a 3" piece of elastic.

 Using a zig zag stitch, sew the curve to reinforce this part of the cap.

Sew the elastic casing using a straight stitch. I experimented leaving out the elastic. I don't recommend it.


 Take the elastic and insert a safety pin on one end.


Insert the elastic into the casing. 


When the end of the elastic is flush with the opening, stitch it in place.

The elastic with the safety pin is hiding inside.

Pull the elastic through to the opposite end and secure with a pin.


 Stitch the elastic to the end.


Going back to the other piece of fabric, press a seam allowance across the bottom edge.


One each tie end, fold twice and press.


Fold up the bottom edge and pin. This forms the two ties and the bottom edge of the cap that sits closest to you face.


This is what it looks like when you're finished pinning:


Sew a straight stitch all the way across as shown below:


Sew another straight stitch all along the bottom edge:


Mark the centre of top of each piece of fabric. (The opposite end of what has already been sewn).


Pin the two pieces RIGHT sides together:


This is what it looks like when you're all done pinning: 


Sew the two pieces together using a straight stitch. If you doubled your fabric, make sure your stitching inside that seam so you won't see it in the finished product.

Then go over your seam with a zig zag. Then if you're ambitious, iron the seam flat to one side.


And there you have it!


 Good luck everyone and stay safe! We got this!

Wednesday, July 15, 2015

Baby Wipes

After just a few days home from the hospital we noticed Judah's skin was turning red and raw in the diaper area. I was using a popular commercial wipe that advertised claims such as 'natural', 'unscented' and gentle on sensitive skin. A quick Google search enlightened me regarding the ingredients in these wipes. No wonder he complained! Anyone up for a little carcinogenic, toxic formula in a baby wipe made of melted plastic? Me neither!

Click here for Cosmetics Database info.

I found several recipes for baby wipes online and as per my usual recipe routine, I made my own concoction. Excluding the cost of the paper towels, solution enough for 50 wipes cost $1.75. A container of 62 wipes at Walmart cost $3.97 plus taxes. You can bring the price down even more putting the solution in a bottle and using reusable cloths / baby facecloths.

I tri-folded 60 sheets of the Bounty Select-a-Size paper towels so they fit into an empty baby wipes container and added the baby wipe solution. You can make them unscented or use essential oils deemed safe for baby such as lavender and chamomile. I skipped the oils and used the Dr. Bronner's lavender scented soap which has the essential oils already added. I found the soap at Vita Health but you can also get it at Superstore or on Amazon.

1 tbsp Dr. Bronner's Organic Pure Castile Soap (baby unscented or lavender)
1 tbsp pure aloe vera
1 tbsp coconut oil or grapeseed oil
2 capsules Vitamin E (acts as a preservative)
Boiled or distilled water (I boil water for 5 minutes)

Mix together ingredients and add enough water to make 500mls. Pour over paper towels / cloths and let it soak through for a few hours before using.

Notes:
Not all paper towels are created equal. I found even with Bounty, depending on where I buy them (Costco vs. grocery store) they are not the same size. Sometimes when making a batch of wipes, I will need slightly more or less paper towels to soak up the liquid.

Over the hot summer, I discovered if I didn't use the wipes fast enough, they smelled a bit rancid. The solution: keep extras in the fridge until you're ready to refill a container.


Tuesday, April 21, 2015

Tortellini Soup

Several people have recently mentioned the fact that I haven't posted any new recipes in a really long time. This is true. Worst pregnancy symptom ever: not enjoying food - the sight of it, the smell of it, the making of it and especially the eating of it. Anyone who tells you morning sickness disappears by 13 weeks is delusional. In fact, the person who invented the term morning sickness is likewise delusional - or cruel. The second worst pregnancy symptom: not liking popcorn. My husband is fully to blame, this being his child who has obviously inherited a disdain for those fluffy, salty, buttery delights.

I'm happy to announce that I will might start food blogging again. I still don't like food but I think "nesting" has kicked in and I feel guilty for not feeding my husband properly.

I found this recipe here but I have torn it to shreds since I disagreed with nearly everything she wrote, except for most of the ingredient list. I was tempted to write about it but I read in Proverbs 10 yesterday that he who slanders others is a fool, so I decided to keep my mouth shut ;)


Olive oil, a generous amount
1 onion, diced
2 cloves garlic, minced
1 tbsp dried basil (or you could throw in about 1/4 cup fresh at the end)
1/3 cup flour
1 can tomato paste (156ml)
1 can diced tomatoes (796ml), I use unsalted
8 cups chicken broth
Pepper, to taste
1 cup cooked, shredded chicken (optional)
1 pkg tortellini, fresh or frozen (750g)
Fresh baby spinach, a few handfuls
1/2 cup fresh Parmesan cheese
1 cup half and half cream (or milk)
Salt, if needed

    1. Sauté onion, garlic and basil in olive oil, adding the garlic and basil near the end of cooking time as it only needs a minute or so.
    2. Stir in flour and continue cooking for one minute.
    3. Transfer to a cooking pot along with the tomato paste, tomatoes, chicken broth, pepper, chicken (if using) and simmer until heated through or until you are almost ready to eat.
    4. Add tortellini and spinach and simmer another 10 minutes.
    5. Remove from heat and stir in Parmesan cheese and cream. The original recipe stated to heat the cream before adding it to the soup to prevent curdling. I wonder about this because I put cold cream in hot coffee every day. However, the power of suggestion was strong and I feared losing a whole pot of soup, so I went ahead and warmed it. If you want to live on the edge, try it cold and let me know how it goes. I'm curious.

    I have bags of cooked, shredded chicken (otherwise known as leftover turkey from Christmas) in my freezer. It's very convenient, I must say.

    Update: As the soup cooled it got really thick. I think if I made this again, I would omit the flour. I don't think it is necessary.

    Monday, March 10, 2014

    Guacamole Chicken Melt

    Sometimes different is good...as long as you have a strong minty piece of gum afterwards.


    2 large avocados
    1 tomato, diced
    1/2 to 1 jalapeño, finely chopped
    2 tbsp onion, finely chopped
    1 clove garlic, minced
    Juice of half a lime, about 1 tbsp
    Salt, to taste
    4 boneless chicken breasts
    Olive oil
    Creole seasoning
    Pepper Jack cheese, sliced


    1. Make guacamole with avocados, tomato, jalapeño, onion, garlic, lime juice and salt. Chill for a couple of hours to allow the flavours to blend.
    2. Coat chicken with a little olive oil and creole seasoning; grill.
    3. Place grilled chicken in a baking dish and cover with guacamole and cheese slices.
    4. Broil a few minutes until cheese is melted and guacamole is warm.


    Tuesday, February 18, 2014

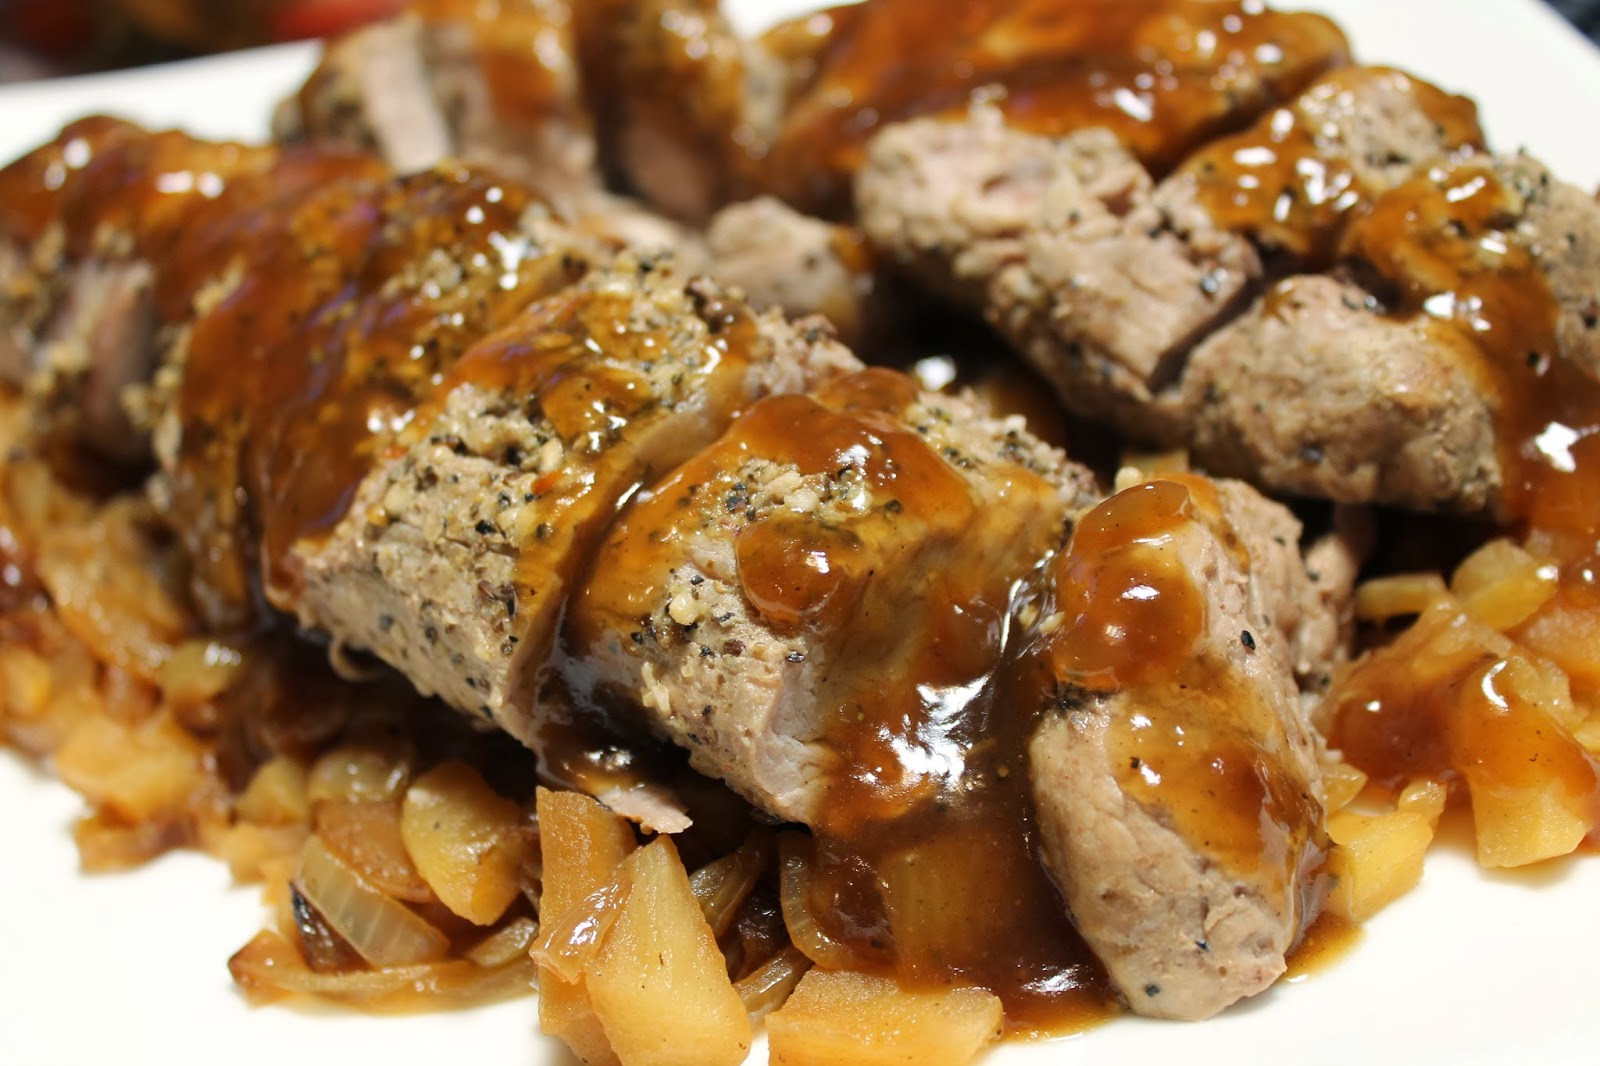
    Pork Tenderloin with Apples and Caramelized Onion

    I never thought I like pork until I discovered pork tenderloin and a good meat thermometer. Now I'm hooked.


    2 pork tenderloins
    Montreal Steak Spice 
    4 medium onions, sliced
    2 or 3 apples, peeled and sliced
    3 tbsp olive oil
    Montreal Steak Spice
    2 cups beef stock
    1/2 cup apple juice
    2 tsp cornstarch

    1. Season tenderloins with a generous amount of Montreal Steak Spice.
    2. Grill on a barbecue or roast in the oven at 400 F (200º C) until meat thermometer reads 150 F (65º C). Remove from the grill or oven and wrap in foil for 10 minutes before slicing. Now, don't let the lower temperature scare you. Apparently, it's safe to eat pork at this temperature since pork is not as dangerous as it was in your grandparent's day. Besides, if you leave your thermometer in the meat while it's wrapped in foil, you'll notice the temperature keeps on rising and will hit 160 F, so everyone's happy and Health Canada won't condemn you.
    3. While meat is cooking, cook onions (gently!!) in a skillet for 10 minutes. Add the apples and cook another 10 minutes. You want caramelization, not a burnt offering.
    4. When the onions and apples are done, remove them from the skillet (but keep them warm) and pour the beef stock and apple juice into the same skillet. Bring to a boil and continue boiling until reduced to about 1 cup.
    5. Dissolve cornstarch in a small amount of cold water. Stir into sauce and cook until sauce is thickened. 
    6. Arrange onions and apples onto a platter. Top with the tenderloin slices and drizzle with sauce.


    Tea Biscuits


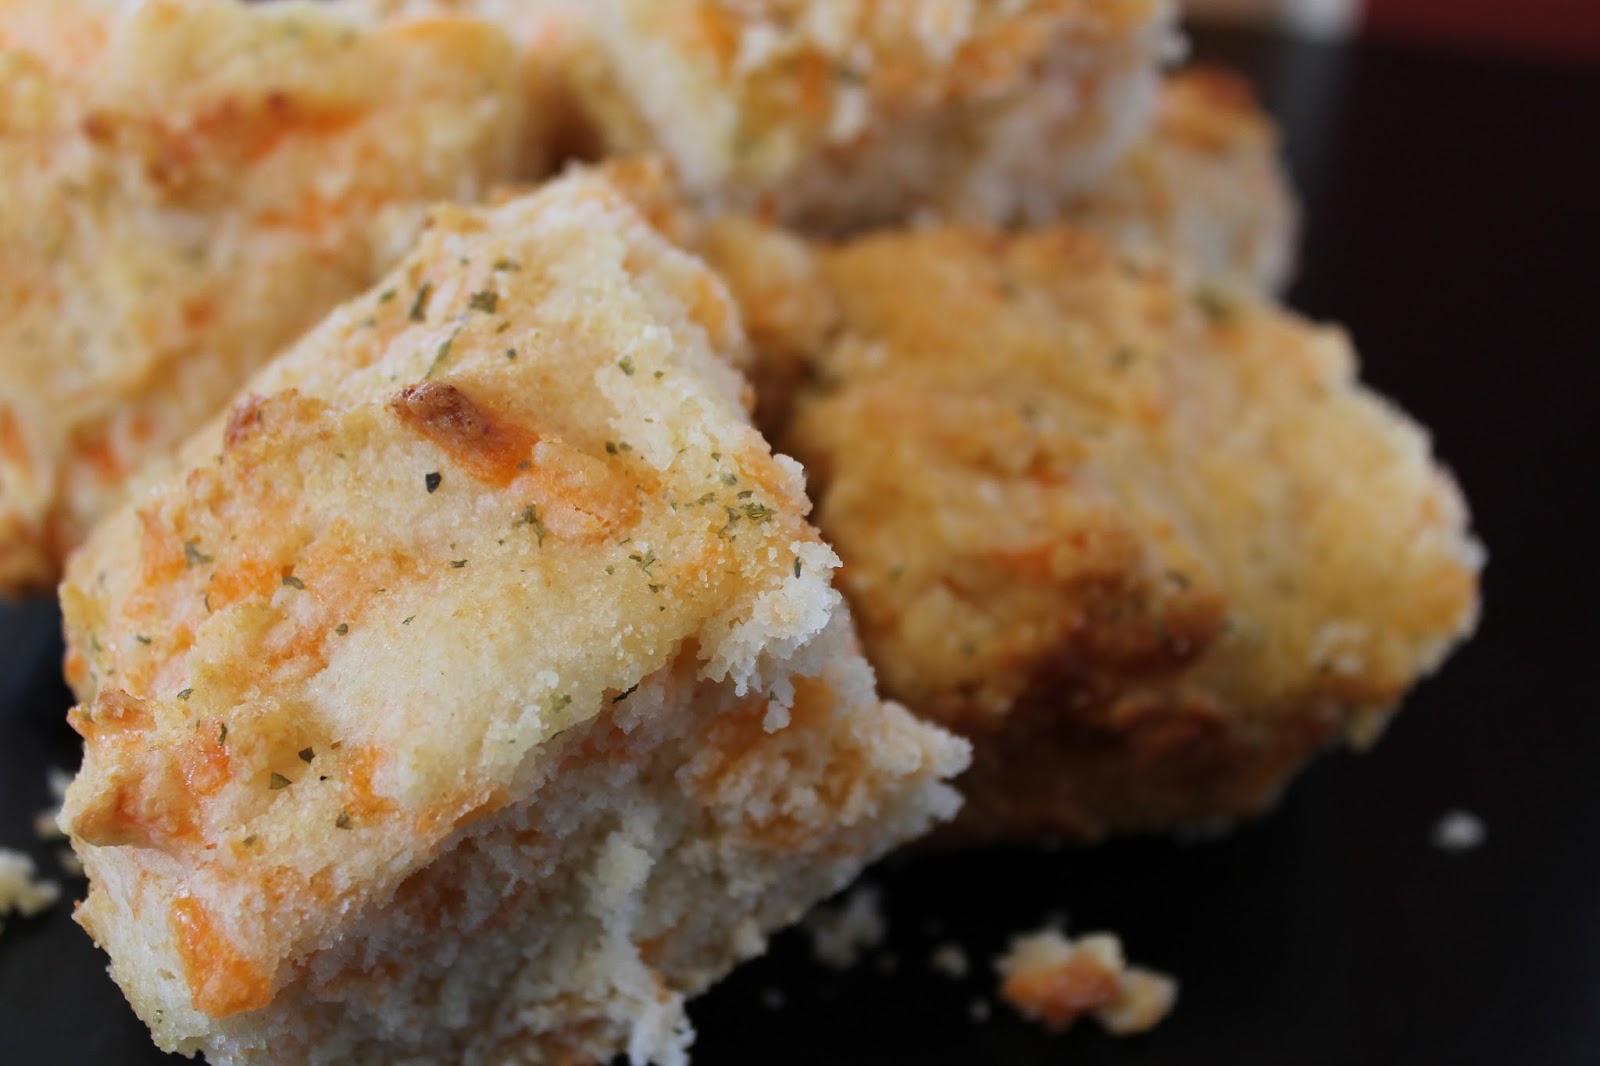
    I love biscuits! I especially love biscuits with butter, buttermilk, cheese and garlic. My mouth is watering as I type. I'm not kidding. You could make these with margarine but really you should skip the one molecule from plastic and go with the real stuff. I like these with or without cheese and garlic. If you want them plain, also skip the final step of pouring the butter over before they're done baking. What you could do instead, is brush the tops with milk before putting them in the oven. The last time I made these, I skipped the cheddar and in the last five minutes, mixed up some melted butter, garlic and Parmesan and poured over the top. I found it a little salty, so you could probably cut back on the salt in the recipe if you wish. One more thing: when I make the cheese biscuit version, I skip the sugar. You won't miss it.

    2 cups flour
    1 tbsp sugar
    1 tsp salt
    4 tsp baking powder
    1 tsp garlic powder, optional
    1/2 cup butter or margarine
    1 cup grated cheddar, optional
    1 cup cold milk or buttermilk

    1/4 cup butter or margarine, melted
    1 tsp garlic powder
    1/2 tsp parsley flakes


    • Mix together flour, sugar, salt, baking powder and garlic powder.
    • Cut in butter until mixture is crumbly, or mix in a food processor for a few seconds.
    • Add cheese.
    • Add milk to make a soft, sticky dough. Sometimes I find the dough is too wet, even though I measure the same way each time, so I have added more flour and no disaster ensued. Try not to over-mix the dough, which could result in tough biscuits.
    • Shape into biscuits and arrange in a greased baking dish. You will find the dough too sticky to roll and cut out the biscuits. Never mind, because I find that method a complete waste of time and energy.
    • Bake at 375° anywhere from 20 to 30 minutes, depending on the size of your biscuits.
    • Just before they are finished baking, mix together the butter, garlic powder and parsley and pour over the biscuits. Return biscuits to the oven for about 5 minutes.
    • Serve warm!

    Monday, February 17, 2014

    Chili

    Recipes for chili abound. Everyone has a favourite and this might not be yours, but it's mine! It's completely versatile. It's one of those dishes where any ingredient is optional and all ingredients can be increased or decreased according to one's preference or to what you find on your kitchen shelves. I like it spicy. Are you surprised? The exciting thing about adding jalapeños is you never know what you're going to get in the end. Sometimes I'm breathing fire and other times I resort to adding some crushed red chilies and cayenne pepper at the end. I remember one time I added four large jalapeños, seeds and all, to a pot of chili. It kept me warm all night long. You can use canned kidney beans to save on time but you might end up sleeping alone for the night.

    3 cups dry kidney beans
    2 lbs ground beef
    1/2 tsp salt
    2 onions, chopped
    2 green peppers, chopped
    2 large jalapeños, chopped
    4 cups mushrooms, sliced 
    4 cloves garlic, minced
    2 cups frozen corn
    1 can brown beans
    1 large can diced tomatoes
    1 can tomato soup
    1 can tomato paste 
    1 large can crushed tomatoes
    1 tbsp basil
    1/4 cup chili powder
    Salt, if needed
    Sugar, if needed
    1. Soak beans in water overnight. Drain and rinse. Cook in salted water until soft - about an hour, sometimes more.
    2. Scramble fry the ground beef with a little salt. Drain fat.
    3. Sauté  onion, peppers, mushrooms and garlic. I usually do the onion and peppers together, adding the garlic near the end because it doesn't take long to cook. Then I sauté the mushrooms by themselves. They don't behave properly with other vegetables. If you wish, you don't need to sauté any of the vegetables. They can go straight to the pot, but sautéing them enhances the flavour and boiled garlic isn't all that palatable, so <gasp> I would substitute garlic powder.
    4. Add all ingredients to a very large pot or crock pot. I prefer a crock pot because I don't want to spend time and energy stirring the chili every ten minutes to keep it from burning on the bottom. You can let it simmer until it's heated through or leave it to simmer for hours. 
    5. Make sure you check the flavour before you're done. You might need more spices or salt depending on the sodium content of your canned ingredients. You also might need to add some sugar if it tastes bitter. I use the canned beans with maple syrup, so sugar isn't necessary.
    6. Whatever you do, don't throw uncooked beans in the pot with the ingredients thinking to save time. You will spend the rest of your life waiting for them to cook. The acid in the tomatoes prevents them from cooking. Ever.

    Friday, February 14, 2014

    Crispy Oatmeal Cookies

    Now this is a perfect afternoon...


    Okay, now before you all get jealous on me, the tea cup was empty, the cookies were still frozen and I was up to my eyeballs in chilli. I made so much I couldn't fit it in the pot. Actually, this happens every time I make chilli, so I should not be surprised. And I have yet to crack open that book.

    These cookies were originally called Ranger Cookies. My mom remembers eating them when she was a wee lass. Not these particular ones, of course. I changed the ingredients considerably, so I thought they should have a new name. That, or the fact I've never seen a ranger or his cookies.

    1 cup butter or margarine
    1 cup white sugar
    1 cup brown sugar
    2 eggs
    2 tsp vanilla
    1 cup white flour
    1 cup whole wheat flour
    1 tsp baking soda
    1/2 tsp baking powder
    1/2 tsp salt
    2 cups crisp rice cereal
    2 cups large flake oats
    1 cup unsweetened coconut


    1. Cream butter and sugars.
    2. Beat in eggs and vanilla.
    3. Mix in flour, baking soda, baking powder and salt.
    4. Get your hands in there and mix in the cereal, oatmeal and coconut.
    5. Drop onto a cookie sheet and bake at 350 F (180º C) for 8 minutes.

    The original recipe called for raisins, which I detest in anything baked, but you may not have the same sentiments, so feel free to add some. I cut out some of the sugar from the original recipe. Feel free to experiment there. You could use all white or all whole wheat flour in this recipe. I wouldn't substitute quick oats. It does horrible things to recipes calling for large flake oats. Crisp rice cereal, AKA Rice Krispies. I was trying to be all 'brand name free'. Which leads me another rabbit trail. The No Name version makes for a ghastly batch of Rice Krispies Squares. Don't do it!

    Wednesday, February 12, 2014

    Southwestern Burritos

    Several years ago I spent some time in Texas, where people love to eat! It's true, everything is big in Texas - big oil pumps, big cowboy hats, big belt buckles, big dinner plates and big toilet paper rolls (you think I'm kidding). I never ate so much food in my life. I was introduced to jalapeños, enchiladas, breakfast burritos - and Chili's Southwestern Egg Rolls. I have waited nine years to sink my teeth into one of those gems. Of course, now that I've discovered that Fargo has a Chili's and a real Mexican restaurant, I shall return. Just for the food. I also discovered, compliments of Google, that many people have tried copying Chili's Soutwestern Egg Rolls, so here is my version. I don't know why Chili's called them egg rolls because they use tortillas. This one looks more like a burrito and I don't deep fry them, which is sad because it's really good that way! But when you eat as many as I have in the last month or so, it's a good thing they're not coated in grease. I have a confession to make, I hid the last one yesterday so I could have it for lunch. Sorry honey! I'll make you some more, I promise.

    2 large chicken breast fillets, seasoned with salt, pepper and garlic
    Olive oil 
    1 cup red pepper, diced
    1 jalapeño, diced
    1 bunch green onions, chopped
    1 clove garlic, minced
    1/2 bag fresh spinach or 1 package frozen spinach, thawed and drained 
    1 1/3 cups frozen corn 
    1 cup black beans, cooked
    1 tsp cumin 
    1 tsp chilli powder 
    Salt  
    Cayenne pepper 
    2 cups shredded Monterey Jack cheese 

    12 flour tortillas

    Avocado Ranch Sauce
    1 avocado, mashed
    1/2 cup mayonnaise 
    1/2 cup sour cream 
    2 tbsp buttermilk 
    3 tsp white vinegar 
    1/2 tsp salt 
    1/2 tsp dried parsley 
    1/2 tsp onion powder 
    1/4 tsp dried dill weed 
    1/4 tsp garlic powder
    Cracked Pepper

    1. Grill the chicken on a barbecue or indoor grill. I used the George Foreman grill since it is currently minus a billion outside and I draw the line at barbecuing past -20 C. 


    2. Saute the red pepper, jalapeño, green onion and garlic. If you don't like the heat, remove the seeds from the jalapeño. Really, what's the point of using a jalapeño if you're going to throw away the best part? Just use a green pepper and save your hands from being on fire for a few hours.


    3. Add spinach, corn, beans and seasonings. Omit the cayenne pepper if you can't take the heat. Continue cooking until the spinach is wilted and the mixture is hot. Remove from heat and stir in the cheese. (No one will know if you cut off a chunk of that Monterey Jack and eat it.) The last time I made these, they were for a bridal shower. I doubled the recipe and got stingy with the Monterey so I used half Monterey and half mozzarella (minus the one little chunk of Monterey).

    4. Assemble burritos. You may end up with more or less, depending on how much filling you put in each one. At this point you can throw them on the grill if you plan on eating them right away or wrap them individually in foil to refrigerate or freeze for later. If you don't have a grill, you can just bake them in the oven, wrapped or unwrapped, depending on how crunchy you want them.

    5. Serve with Avocado Ranch Dipping Sauce. You don't have to, but you should. You can cut these in half and use them as an appetizer or leave them whole and make it a meal.

    6. To make the sauce, throw everything in a blender or food processor. If you're using something like Miracle Whip instead of mayonnaise (I personally thinking mayo is disgusting unless you disguise it in a recipe), just omit the vinegar.


    Tuesday, February 4, 2014

    Apple Pecan Salad

    This is my new favourite salad. I will most likely keep eating it until I'm sick of it and then discover a new favourite salad. It's really yummy with avocado slices too. If you want to take it to work, I discovered that if you mix the apple slices with the dressing, they don't turn brown. Take the time to toast the nuts because it really enhances the flavour. I do it in a dry frying pan - and usually forget that I'm toasting them until I see the smoke rising...

    Mixed salad greens
    Sliced apples
    Dried cranberries
    Toasted pecans or walnuts
    Crumbled feta
    Poppyseed dressing

    Friday, January 31, 2014

    Chicken Pot Pie

    Well, here you have it. The end result of making multiple chicken pot pies. Of course I'm not complaining that I have eaten chicken pot pie ten days out of the last month. It's such a forgiving recipe. You can switch it up, add, subtract, multiply and divide, gather your chicken from various sources, use up your leftovers, add some milk or cream, pile biscuits on top instead of a pastry crust, make individual pot pies in ramekins or accidentally drop half a bag of frozen peas in the pot. Incidentally, you might want to line the bottom of your oven with foil. (My oven is getting well acquainted with Easy Off at this very moment.) This recipe makes two pies - because you can never have too many chicken pot pies.

    Olive oil
    1 small onion, chopped
    1 leek (white and light green part), chopped
    1 large carrot, chopped
    1 celery stalk, chopped
    2 cups cremini mushrooms, sliced or quartered
    2 cloves garlic, minced
    1/3 cup flour
    1/2 tsp salt
    1 tbsp dried thyme leaves
    1 tbsp dried savoury
    Cracked pepper, to taste
    6 cups chicken stock
    2 medium potatoes, diced and cooked
    4 cups cooked chicken, chopped
    1 cup frozen peas
    1 cup frozen corn

    Pastry
    2 1/2 cups flour
    1/2 tsp salt 
    1 cup cold butter
    Cold water
    1 beaten egg


    1. Sauté onion, leek and carrot in oil for 10 minutes.
    2. Add mushrooms and garlic and sauté another 5 minutes.
    3. Stir in flour and seasonings.
    4. Add chicken stock and simmer until thickened.
    5. Add potatoes, chicken, peas and corn.
    6. Divide into two greased deep dish pie plates.
    7. Put flour, salt and butter in a food processor and pulse for a few seconds.
    8. Transfer to a bowl; add cold water a spoonful at a time until dough forms.
    9. Divide in half and roll each piece slightly larger than the top of the pies. Arrange on the pies and brush with egg.
    10. Bake at 400 F (200º C) for 15 minutes and then at 350 F (180º C) for 45 minutes.


    Notes
    • Cremini mushrooms are the brown mushrooms that sit next to the bulk white mushrooms at Superstore. They are the same price, but I think they have more flavour.
    • I could write for hours on how to make a successful pie crust without swearing, but just google it if you don't know. Or invite me to lunch at your place and I'll show you. I used a butter crust because I don't like the taste of a lard or shortening crust. I'll warn you, it's a little harder to work with. If you're intimidated by pie crust, just buy a couple of frozen pie crusts. I won't judge you.
    • The filling is quite runny when the pie is fresh out of the oven but it firms up if you let it sit. It stays warm for hours!
    • This could easily turn into a beef pot pie, using leftover roast beef, beef stock instead of chicken stock and omitting the thyme and savoury.

    Saturday, January 18, 2014

    Chocolate Almond Cake


    Now I know why Betty Crocker became famous for her cake mixes. 'Just add water' sounds like a great alternative to 'I think I'll hide in the the kitchen for half the day so I can have this cake for supper'...until of course you sit down and take that first bite...


    Cake
    2 1/2 cups ground almonds
    1/2 cup butter
    180g chocolate
    1 cup sugar
    5 eggs, separated
    1/4 tsp salt

    Glaze
    250g chocolate
    1/2 cup butter
    5 tbsp water

    Fresh berries
    Shaved chocolate


    1. Line the base of a round 9” (24cm) springform pan with parchment paper.
    2. Toast almonds at 350 F (180°C) until pale golden, about 10 to 15 minutes, stirring about halfway through baking time.
    3. Melt butter, chocolate and sugar in a double boiler. Cool to lukewarm.
    4. Whisk egg yolks and add to chocolate.
    5. Add almonds.
    6. Beat egg whites and salt until soft peaks form.
    7. Add to chocolate 1/3 at a time.  Don’t over mix.
    8. Bake at 350 F (180°C) for 35 minutes. Keep the cake in the pan as it cools.
    9. For the glaze, melt chocolate, butter and water in a double boiler. Let it cool to lukewarm
    10. Remove the cake from the pan and put it on whatever you plan on serving the cake in. Pour the glaze over the cake, letting it run over the sides.
    11. Decorate with fresh berries and shaved chocolate - or get creative and do something different. Recipes are made to be altered!
    Notes
    • The darker the chocolate, the richer the end result. Go dark! 
    • Don't have a double boiler? Me neither. Just put water in a large pot and put a smaller pot on top. Whatever you do, don't attempt to melt chocolate in the microwave. Disaster awaits those who do...
    • I read somewhere you should never mix water with chocolate because the chocolate will clump and never melt. To the person who made that statement, you don't know everything.

    Thursday, January 16, 2014

    Maple Spiced Chicken with Sweet Potatoes

    It's been 9 weeks and 2 days since November 20th. I've written pages and pages since then. I haven't posted any of them. Maybe one day I will share this journey with the world but for now it's just me. I no longer burst into tears without warning, the nightmares have ceased - mostly - and I've been cooking up a storm. It's a great January day for comfort food and so I created this. (I made some notes at the end if you're interested in the finer details.)


    4 medium sweet potatoes, peeled, cut into 1” cubes
    1 onion, chopped
    2 garlic cloves, finely sliced (or 1 tsp garlic powder)
    1/4 cup brown sugar
    1 tsp cumin
    Salt
    Cracked pepper

    1/2 cup flour 
    1 tsp cumin
    1/2 to 1 tsp salt
    1 tsp onion powder
    1 tsp garlic powder
    1/2 to 1 tsp chipotle chilli powder
    Chicken pieces, bone in, skin removed

    1/3 cup maple syrup
    Cracked pepper
    1/3 cup Parmesan cheese
    1 tsp dried thyme leaves (or a handful of fresh)
    1/3 cup chopped pecans

    1. Arrange sweet potatoes, onion and garlic in a baking pan lined with parchment paper. 
    2. Sprinkle brown sugar, cumin, salt and pepper.
    3. Mix together flour, cumin, salt, onion powder, garlic powder and chipotle chilli powder.
    4. Dredge chicken in seasoned flour and arrange over potatoes.
    5. Bake uncovered at 350 F (180º C) for 2 hours, or until chicken and sweet potatoes are cooked.
    6. In the last 30 minutes of baking time, baste chicken with maple syrup 3 times (every 10 minutes). In the last 10 minutes of cooking time, sprinkle cracked pepper, Parmesan cheese, thyme leaves and pecans.

    Notes:
    • I measured absolutely nothing. All the measurements above are an estimate of what I think I might have used. (I know I say this every time!)
    • Chipotle chilli powder tastes nothing like your regular chilli powder so don't think about substituting because the flavours are not similar. This one's my new favourite discovery. It's got some heat, because as you all know, I like to live on the fiery side of things. Surprisingly enough, I didn't find the end result spicy. Next time, I'll probably increase this spice and add some cayenne pepper.
    • Cumin - crazy expensive in the spice aisle; super cheap in the ethnic food aisle at Superstore. $7-8 dollars for a tiny spice bottle (40 grams); less than $4 for 350 grams. 
    • Don't use boneless chicken because it will cook long before the potatoes and dry out. If you must use boneless chicken, boil the potatoes for 10 to 15 minutes before putting them in the pan.
    • Coating the chicken with flour gives it a crispier finish, since the skin is removed. If you have declared war on all things flour-based, just sprinkle the chicken with the spices (the amounts used might be less??).
    • Parmesan cheese. I buy a wedge of real Parmesan cheese at the deli, grate it up in a food processor or Magic Bullet and keep it in the freezer. I don't like the taste of the stuff that sits on the shelf. This is much nicer.
    • I didn't use pecans when I made this recipe but I will try it next time.
    • Aunt Jemima never laid eyes on a maple tree. Enough said.


    Tuesday, December 17, 2013

    Roasted Veggies

    These veggies are a staple at our house, either just as they are or added to other dishes like lasagna and quinoa. (Those recipes to follow.)


    Sweet peppers (red, orange and/or yellow)
    Zucchini
    Red onion
    Mushrooms
    Fresh garlic cloves
    Olive oil
    Basil
    Cracked pepper, chopped jalepeños or dried chilli flakes, depending on how much heat you want
    Salt


    1. Chop all the veggies. Remember they shrink, especially mushrooms, so don't chop them really tiny.
    2. Toss them in a bowl with olive oil and spices. Don't be afraid to be generous with your spices. The more flavour you use, the less salt you need to make it edible.
    3. Line a baking sheet (or two) with parchment paper and arrange veggies on the baking sheet in a single layer.
    4. Bake at 375º or 400º, stirring them around a couple of times, until the veggies are beginning to look slightly charred. 
    5. In the summertime, I do these on the barbecue in a grill basket. Summer is also the perfect time to add in extras such as cherry tomatoes (whole) and asparagus.